Here is the introductory guide on how to use this operating system.
After reading this, you may notice many similarities to Windows XP/7 and even 10 and 11 in the things you can do and how applications and files are organised. Though not perfectly identical as Windows since it does have its own unique quirks and still relies on old outdated ways of organising files and folders from the original Windows 95 days, this is no surprise. Both operating systems are quickly merging to supply features which are not that much different from each other. Apart from the fancy interface needed to be different for copyright reasons, everything else is looking increasingly the same. Thus you must decide whether macOS is really for you, or whether you can get by with Windows 7, or 11 as the case may be today. Both are highly bloated OS. Only Microsoft was attempted to streamline the OS in a newer version.
After installing macOS
On freshly installing macOS on your computer, you will be asked to create a user account for yourself. This is the administrator's account allowing you to have special privileges for the computer. Later you can create more accounts for all your users, or become a user yourself to help increase the security of your administrator account. Among those privileges you will get as an administrator is the ability to create other user accounts, to allocate certain levels of privileges to those accounts, and to install software in the Applications folder than may or may not be accessible to other user accounts.
When a user account is created, a "home" folder is also created whose name is the username of the account. The folder is stored inside the Users folder at the root level of your macOS startup disk. This is the place where Apple wants to keep your files in specific folders created by Apple, such as a Documents folder, an Applications folder, a Music folder, a Movies folder, and so on.
Once you have created your administrator account and reached the desktop (hopefully successfully), you will notice a menu bar running across the top of the screen. In Microsoft Windows, this is at the bottom by default. But Apple has chosen since 1983 to keep the menu at the top. It contains a variety of the more useful "Finder" commands for helping you find files and folders and perform common file- and folder-related tasks on those files and folders. They are grouped under the Apple icon in top left corner, followed by Finder, File, Edit, View, Go, Window, and Help. There are also a host of icons and a clock in the top right corner. This menu bar is certainly not unlikely the taskbar in Windows XP except Microsoft has wisely kept the taskbar clean and has provided the essential commands as a pop-up menu everytime you right-click on a folder, file, taskbar or desktop.
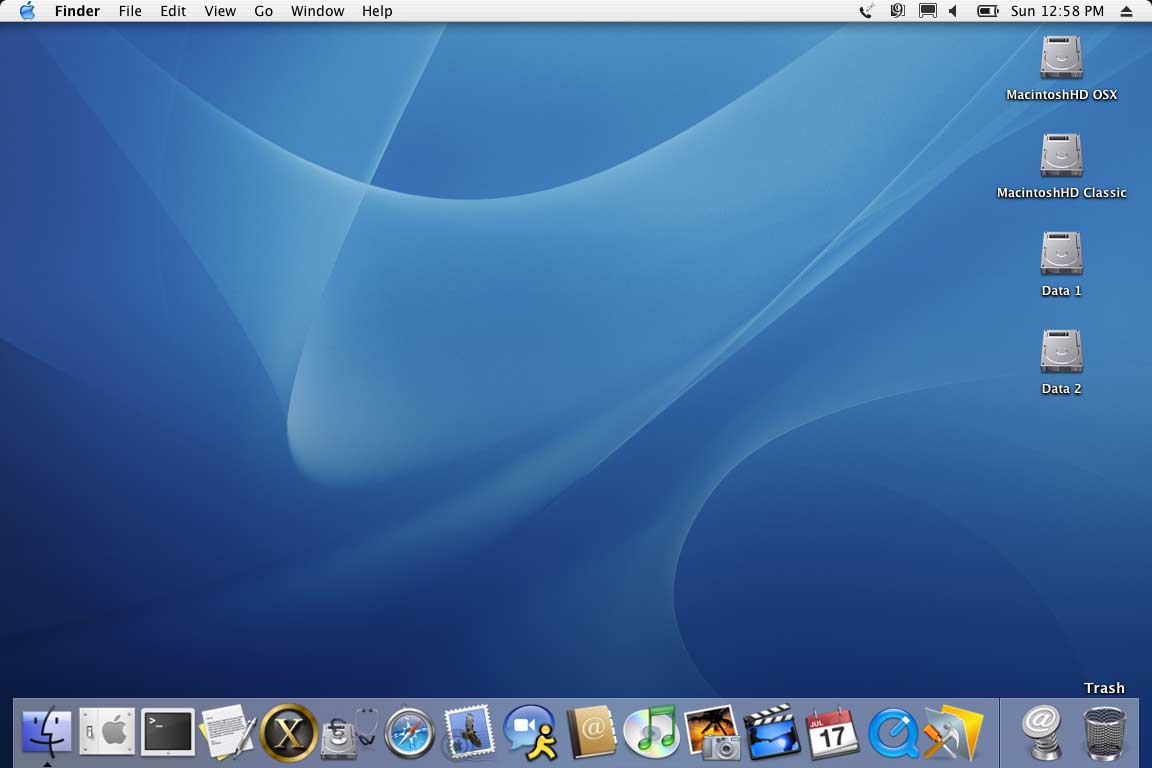
In Windows XP, you may have been offered a Recycle Bin icon on the desktop. In macOS version 6 to 9, the trash can would appear on the desktop too. In OS X and macOS, the trash is hidden in a pop-up applications/windows/files bar at the bottom of the screen known as the Dock. If you can't see the dock, move your cursor straight to the bottom (or sides) of the screen to see it pop-up. The Trash is over to the far right of the dock looking like a metallic rubbish bin.
The dock is also a bit like the Taskbar in Windows XP in that everytime you launch an application, the application's icon will appear in the dock. In Windows XP, the name of the application will appear in the Taskbar instead.
In essence, you could say the dock and the menu bar in OS X is Apple's version of Microsoft's Taskbar in Windows XP.
NOTE: Another similarity between the two competing operating systems are the maximise, minimise and close buttons on the windows. OS X uses traffic light-coloured buttons containing a plus (+) and a minus (-) sign and a third button to close the window on the top left corner of any window. In Windows XP, they appear as ordinary buttons in the top right corner of any window (not a lot of thought in the design).
What's in the menu bar?
The Apple icon - This gives you access to hardware (e.g. About This Mac, Sleep, Restart and Shutdown), user account (Log Out...), system preferences (the equivalent to the Control Panel in Windows XP including a quick access to the Network under Location), and favourites (e.g. recently opened documents and applications). The nearest equivalent to this menu in Windows XP is the Start button.
Finder - This is the application you are looking at (which is why you see the menu commands of Finder, File, Edit etc). It is the application by which you find files and folders, obtain general information about your files and folders, and helps you to control the way your icons and windows look, behave and feel. If you launch another application, Finder will change to the name of the application you are in. Now within the Finder, you are provided with additional menu commands called File, Edit, View, Go, Window and Help. The File menu command gives you general information about files and folders and is the place to help you search for a file or folder on your hard disk. The Edit menu command provides copying, pasting and undo capabilities. The View menu command gives you options on how to present your icons on the desktop and in windows shown by the Finder. The Go menu command is a bit like your My Documents (OS X calls it Home), My Computer (OS X calls it Computer) and other folders (e.g. a shortcut to the Applications folder) in Windows XP. Thrown into this menu command are additional icons for accessing common network resources such as Apple's own iDisk service and connecting to a network. The Windows menu command gives you options on how to arrange and view multiple windows. And finally, if you need Help to use the Finder, go under the Help menu command.
Shortcut icons - At the far right of the menu bar will be a host of shortcut icons for checking the time, ejecting a DVD/CD disk, battery status, volume, display resolution size, connect to the internet, whether or not to start or stop the Classic OS9 environment (for PowerPC users only) etc.
Compared to Microsoft's Windows XP, this is a surprisingly complicated approach from Apple to helping users achieve their work on a computer. Apple has been noted for its simplicity in design in the past, especially with the original System 6 to 9 OS versions. But for some reason it seems Microsoft is doing much better in the designing and organising of features under Windows XP. Perhaps this explains why 90 per cent of all computers run Windows XP these days compared to OS X or other operating systems? However, with the advent of arm64 processors providing decent speed and the decision by Apple to keep the desktop as clean as possible until you dig a little deeper into the OS, it is a design decision from Apple that many users can live with.
Is macOS any different compared to Windows XP?
Not really. A freeware utility called FlyakiteOS X v3.5 has proven this by the fact that it can change the appearance of Windows XP to look remarkably like OS X (and the latest macOS), including a pop-up docking station for your favourite applications at the bottom. You would be scared beyond belief when you see what this utility can do. Therefore, it doesn't take much to realise that some genius out there could decide to create a similar freeware tool to change the appearance of OS X/macOS to look like Windows XP if they wanted to. However, most users are generally happy with how macOS looks today.
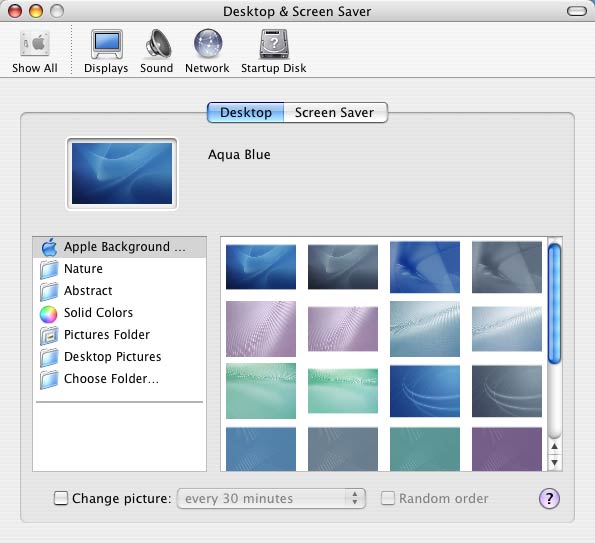
Changing the background
If you ever wish to change the background picture to something else in OS X, move your cursor onto any part of the background picture, press the Ctrl key, press the mouse button (or trackpad button) once, and a pop-up menu will appear. Select "Change Desktop Background..." from the pop-up menu. The "Desktop & Screen Saver" control panel (or system preference pane) will appear. Choose your background by clicking once on an image and waiting a few seconds for the background on the desktop to change.
OS X Update
To control whether you wish to let OS X automatically download and install updates or for you to do the manual updates yourself:
- Click the Apple icon on the menu bar
- Choose "System Preferences..."
- Click the Software Update system preference pane under the System category.
- Either click the "Check Now" button for manual checking and downloading of updates or place a tick in the check boxes for automatically checking and downloading updates at a set time interval and whether this should be done in the background to avoid annoying you with a message while you work.


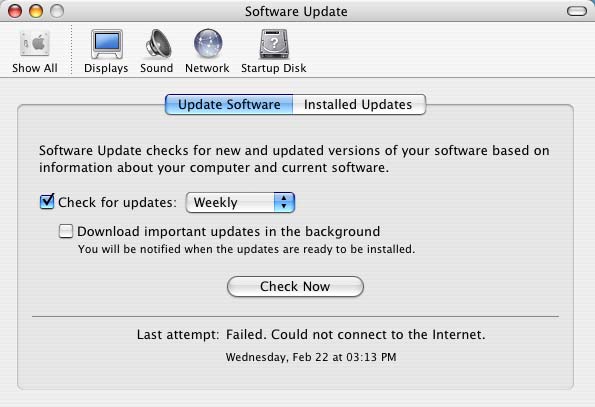
Our recommendation is to switch off all automatic checking and downloading of updates as this is how Apple learns what you do on your computer all day long. You are better off going to the Apple web site and downloading manually the full and final Combo update for your version of macOS, or wait until an official announcement is made of a new OS version with details of the security improvements. Then you can install the OS when you are ready.
Tweaking macOS
The good thing about Windows XP is the ability to restore the system files each time the computer is restarted or a user logs out. This is useful for protecting the system files from damage or unauthorised/unknowledgeable tampering by both users and the administrator during normal operation of your computer. Unfortunately Apple has not seen the value of including such a feature for administrators. Ordinary users running applications in macOS are simply prevented from modifying system files because of restricted permissions.
But what if an application could bypass the permissions and change a system file? Does OS X have an extra safety feature to protect its own files? Apparently not! So far we know of no such feature under OS X.
The nearest thing you have got is the Restore feature under the Disk Utility. But you must set up the disk image containing the application for restoring and tell OS X when to restore. And it will not work for OS X system files. You must use the OS X installation DVD to manually reinstall the entire OS X system files.
Clearly not as nice as Windows XP.
At any rate, if you want to reduce the clutter of icons on the menu bar or rearrange the order in which the icons appear:
- Move the cursor to an icon in the menu bar you want to remove or move.
- Press the Apple/Command key (next to the Option key and left of the Space bar).
- Click the mouse button and while keeping the button down, drag the icon off the menu bar and let go of the button to remove it, or drag to another position on the menu bar.
For other useful tweaks:
- Click the Apple icon on the menu bar.
- Select "System Preferences..."
- Click on the various system preference panes for controlling general appearance (Appearance), the desktop and screensavers (Desktop & Screen Saver) the dock (Dock), keyboard and mouse control (Keyboard & Mouse), and volume and sound alerts (Sound).
- Choose what you like best.
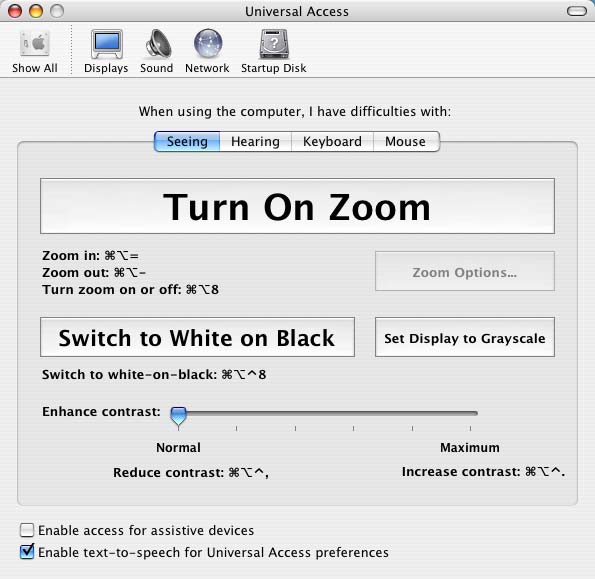
Opening Universal Access
In Windows XP, you have the Accessibility Wizard to help you configure Windows XP to suit your vision, hearing and mobility needs. In OS X, this is called Universal Access:
- Click the Apple icon on the menu bar.
- Select "System Preferences..."
- Click on "Universal Access" system preference pane under the System category.
- Choose the area you would like OS X to give you extra assistance, whether it will be in seeing, hearing, keyboard or mouse.
- Choose the options you think gives the improvements you were expecting.
Cleanup and setting correct permissions
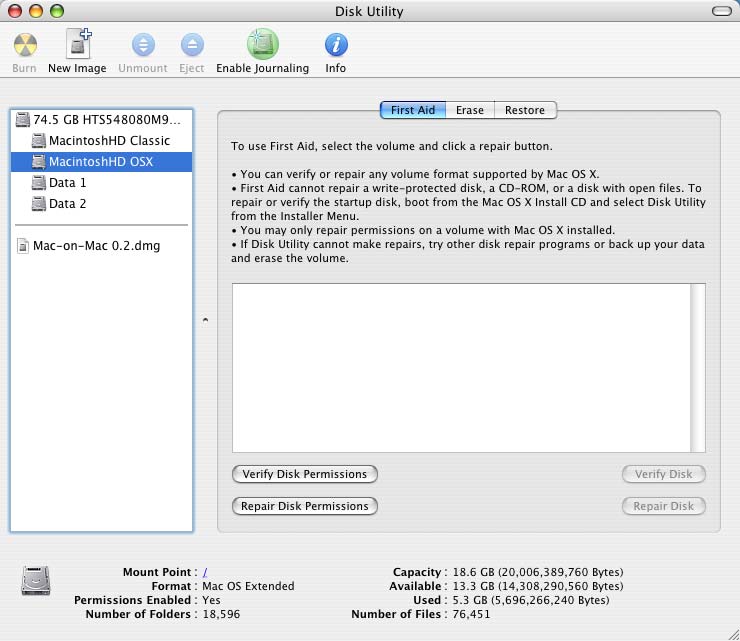
Now that OS X has been customised to suit your needs, run the Disk Utility:
- Open the Applications folder in your hard disk. Alternatively, select "Applications" under the Go menu in the Finder.
- Open the Utilities folder
- Double-click on the Disk Utility application to launch it.
- Select the hard disk to scan for errors.
- Make sure you are in the "First Aid" section of the Disk Utility.
- Click the "Repair Disk Permissions" button.
Please note there is no defragmentation utility supplied with OS X. It is presumed OS X can handle aspects of the defragmentation process on its own.
We recommend you should purchase a quality third-party disk repair utility for OS X such as Alsoft's Disk Warrior 4.x. It will handle a wider range of problems associated with OS X and the hard disk itself.
The Files and Settings Transfer Wizard
Windows XP has an excellent feature for carrying over those preferred settings for fonts, colours, wallpapers and more, as well as files and applications from one Windows XP machine to another. Unfortunately, in OS X, there are no obvious means of transferring files, applications and settings from one OS X machine to another. This is because Apple expects you to reinstall all applications and/or re-enter serial numbers from the original installation disks and for you to figure out which files you want to transfer.
As for the general system and application settings, you must manually copy the file settings yourself and place them in the right location on another OS X computer. You achieve this in the following manner:
- Log on as the administrator.
- Open up the OS X startup hard disk.
- Open the Users folder.
- Open the folder whose name is the username of your account where you want to extract the settings.
- Copy onto a disk all the folders you see. Application preferences are usually stored in the Applications and Library folders. All other folders such as Movies, Documents, Music, Pictures, Public and Sites are your personal files.
- Go to your new OS X computer, log on as administrator, open up the User folder, and select the user account folder to store the personal files and settings.
- Copy and replace all the folders you see in the user account folder with the ones you have on the disk.
- To transfer software applications, you should reinstall the applications from the original installation disks.
Setting up the printer on macOS
Here is the technique to set up a printer under OS X
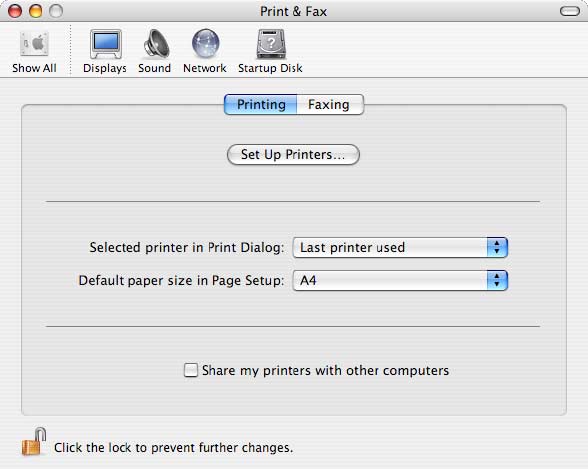
- Open System Preferences
- Click on Print & Fax
- Choose Printing window
- Click the "Set Up Printers..." button
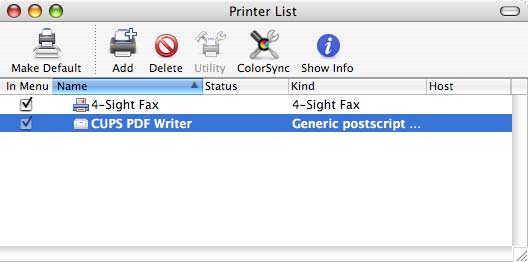
- There should be a list of printers, if not, click Add.
- If there are printers, double click the printer you want.
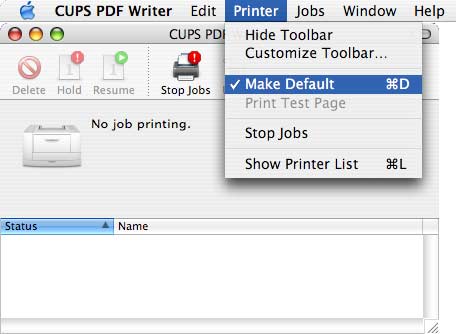
- Under the Printer menu command, choose Make Default or press Command D.
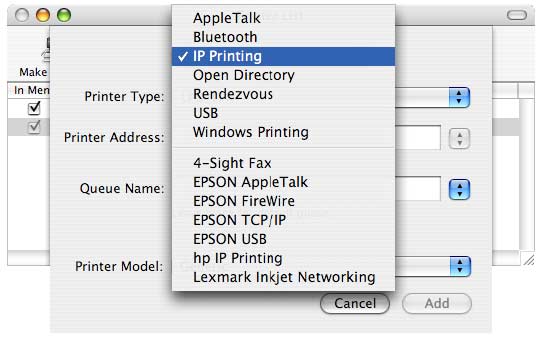
- If you have to add a new Printer, click Add and choose from the pop-up the port where the printer is connected
- If you select IP Printing, type the Printer IP Address and the name you want to use for the printer in the Queue Name (without spaces, but underscore characters are okay). Don't try to use default queue. Finally choose the Printer Type and click on Add.
If the printer does not appear, make sure the Printer is turned on, the computer sharing the printer is actually sharing, and you do have network access (e.g. do you have internet access?).
Also check that the correct printer is selected (make the correct printer the default) and that documents are not waiting in the queue because the user has stopped the printer queue.
For organisations, you'll probably need the photocopy ID number (no password) to print from a Mac to a UC photocopy/printer machine.